This post shows you how to install WordPress on Ionos.co.uk the hosting company I use for some of my blogs. Ionos packages include a free domain and SSL.

Choosing A Host
You will need a host when using WordPress.org. A host will store all your blog data on a server so that it can be accessed over the Internet.
Compare packages and prices before making your decision which hosting company you want to use.
I use Ionos (used to be known as 1&1) and Siteground for hosting various blogs, the instructions that follow are for installing WordPress on your domain with Ionos.
Here are some more popular hosting companies for you to consider if you prefer to not use Ionos:
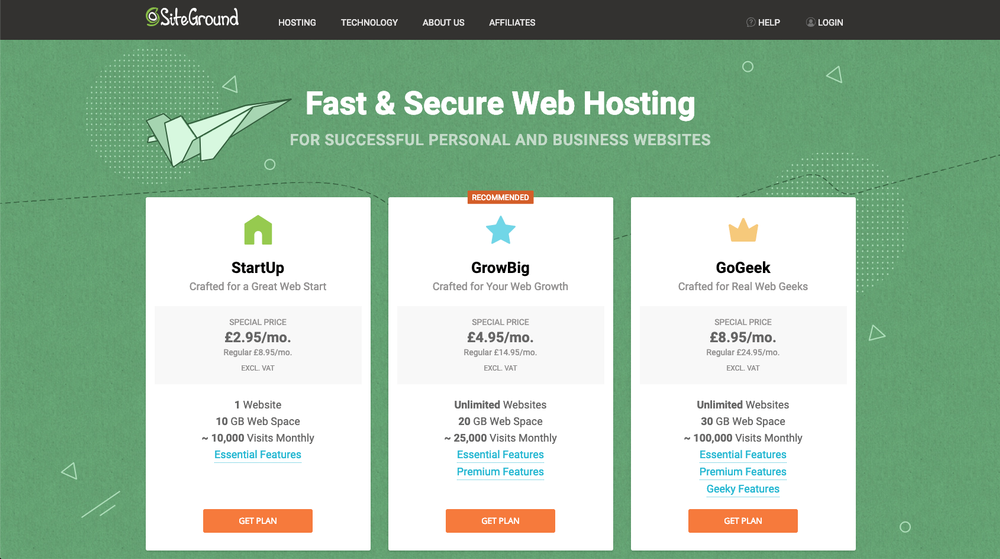
Siteground
SiteGround – Very popular with bloggers:
- The StartUp plan is perfect for people with one website that are starting now
- The GrowBig plan is a great value for money offer, including the option for multiple websites
- The GoGeek plan is perfect for people with e-commerce and larger sites
Tsohost
Tsohost– Low-cost WordPress hosting for bloggers and businesses – small to big. Fully managed, one-click install, superior speed, plus a free domain.
Choose a Domain & Purchase Your Package
Let’s start setting up WordPress with Ionos!
Note: They may change their set up process at any time by changing prices, design and navigation, this I have no control over.
If you see a slightly different setup to how I have it laid out here, use this as a rough guide. Read through first to give you an idea of how the setup works and then follow their prompts throughout the signup process when you are ready.
Go to the Ionos website HERE and find the WordPress packages. It’s up to you which package you choose, I always start with the basic package. You can always upgrade later when you outgrow your current package. I use managed WordPress because security patches and updates are automatically executed.

As you can see the packages are really good value. (Note: The cost above is the 2019 price, it could change in the future.)
You get a FREE domain with Ionos packages for the first year!
Before selecting, take some time in thinking about what your blog is going to be called.
Don’t rush this part, make sure it is something relevant to what the site is about unless you are branding yourself, then you would use your own name as the domain.
Take a look at https://www.namecheckr.com/ to make sure your blog name is available on social media, there’s nothing more annoying than setting up a blog only to find your name isn’t available for your social profiles.
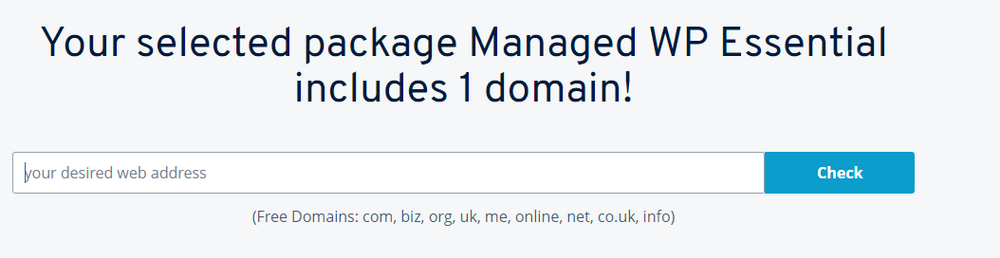
When you’ve decided on a domain name select your desired package. A box will appear for you to check to see if the domain you want is available.
Tip: It’s a good idea to check the Companies House website to make sure you don’t end up with the same name as a registered business.
Once you have chosen a domain name, add it to your basket and continue to purchase. You may be prompted to buy extras but skip these, just continue to the checkout.
When purchasing your package, you will create login details to your hosting control panel, make a note of these. Once completed you need to go and log in to your account and then you can install your WordPress on your domain.
Install WordPress on Your Domain & Activate SSL
Once you have ordered your domain and hosting you will get an order received notification. Click the Get Started button and a page will appear as below, then click start your project:

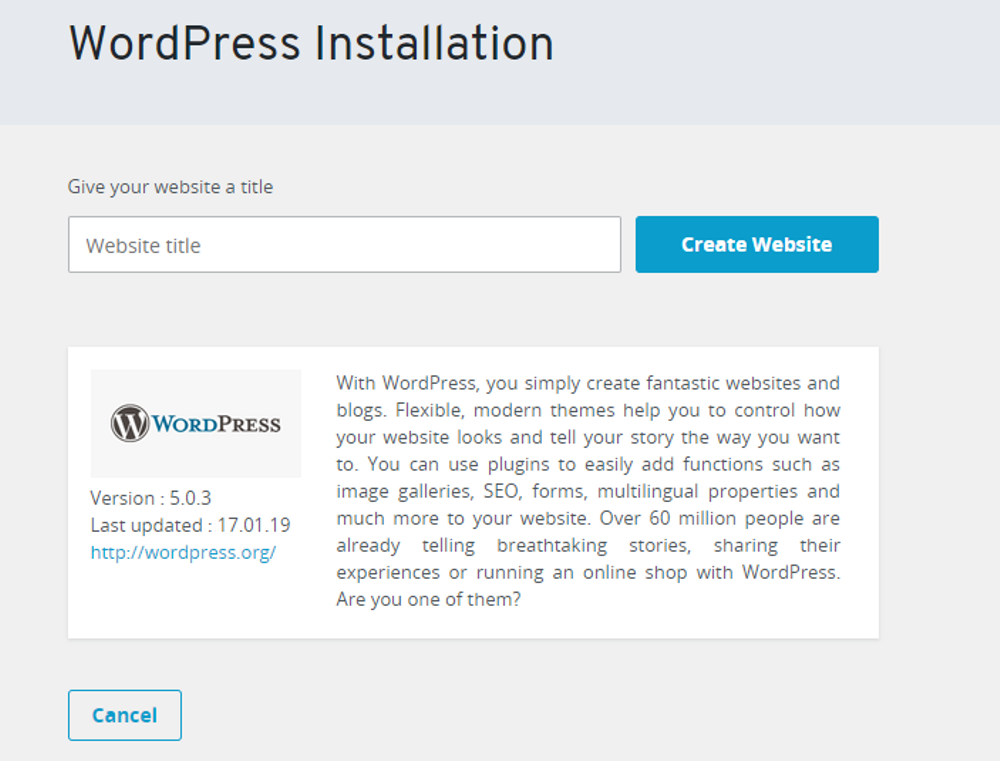
A WordPress installation page will appear:
Give your website a title that best describes it, this will probably be the name of the website, then click create website:
Now, create your username, password and agree to the terms of use:
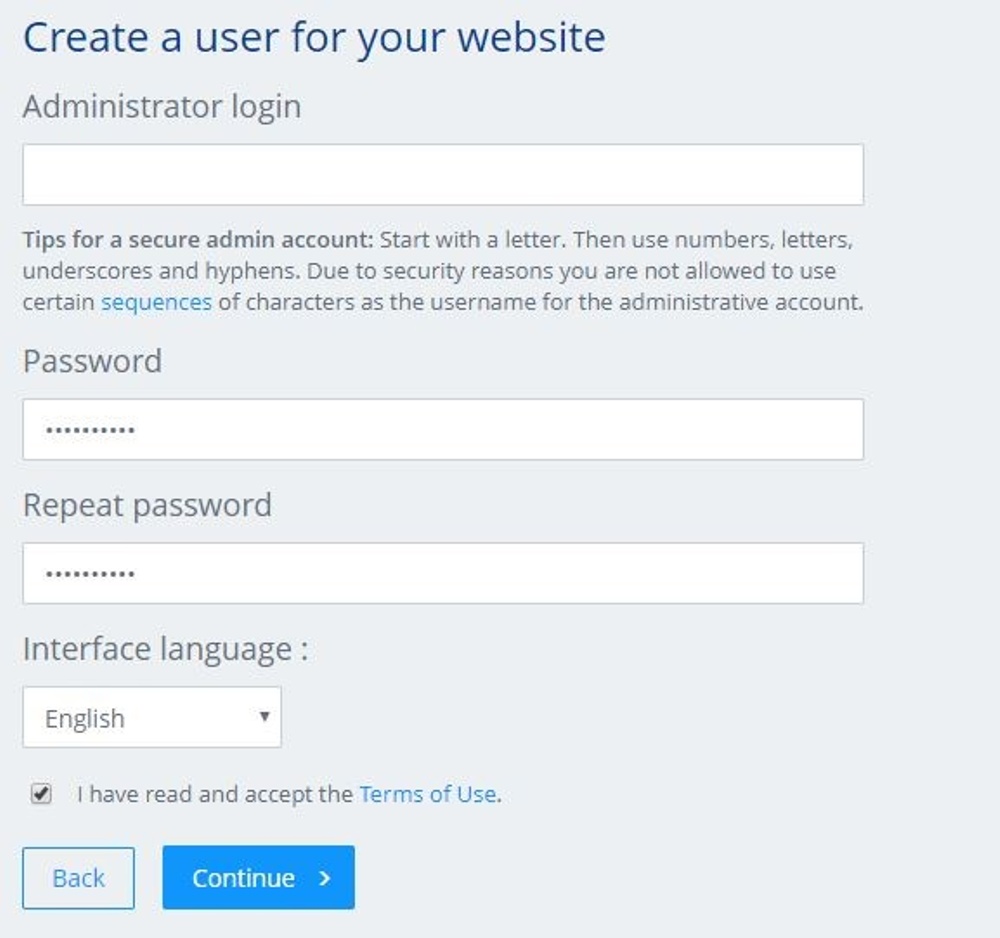
Note: This is different from the login details for the control panel of your Ionos hosting account. After successful installation, you will need this login data to access your WordPress blog/website, please make sure you take note of these details.
Once done click Continue.
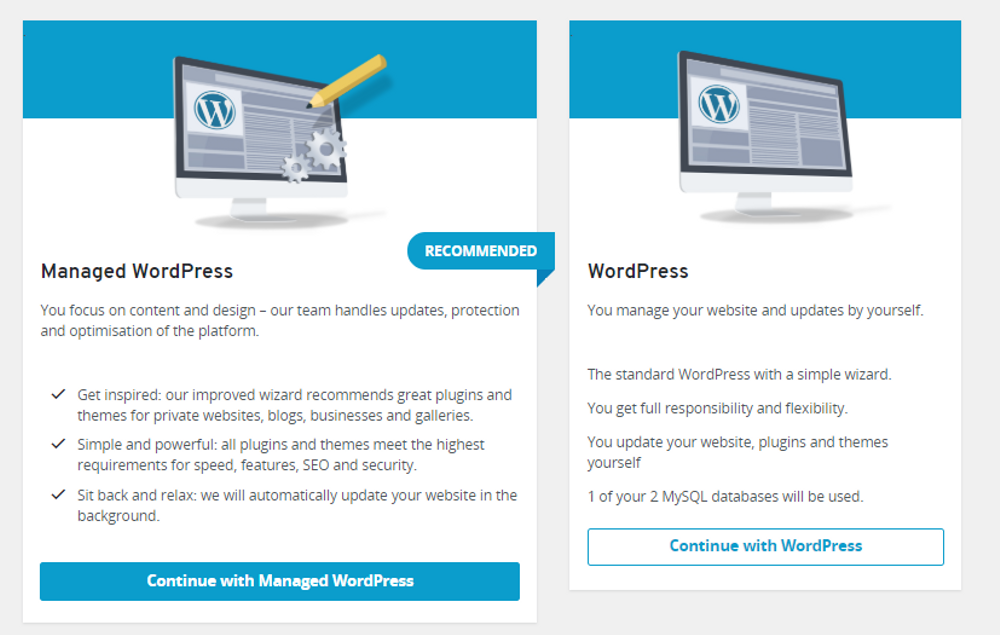
Select the Managed WordPress, this is what I use and recommend you start with.
With this service, IONOS will install the important plugins for you (you can add more plugins later) and handle all the WordPress updates.
You can switch to the standard unmanaged at any time, but, if you select standard first, you cannot switch back to Managed.
Now choose managed WordPress – click Continue with Managed WordPress:
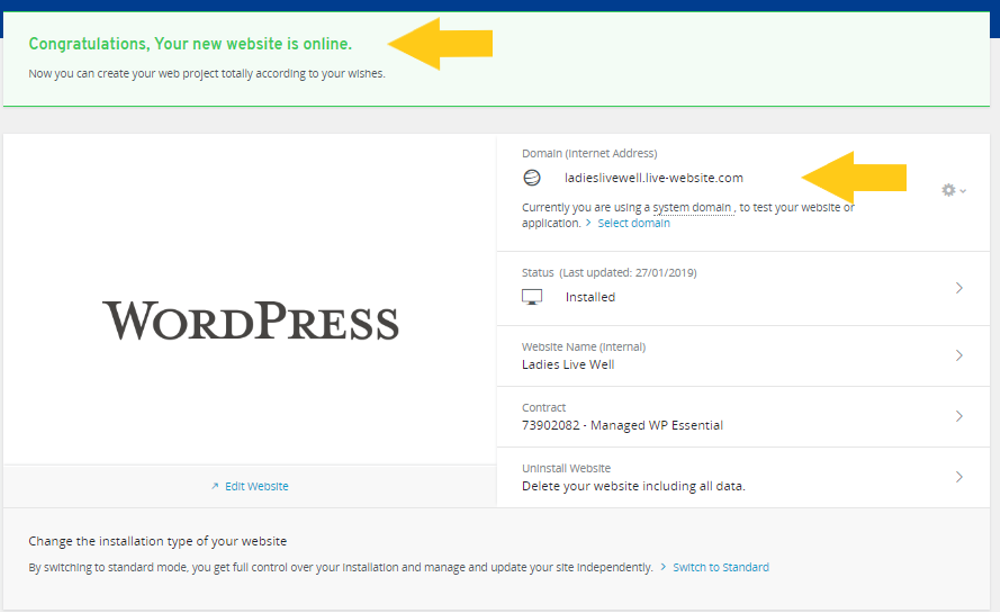
The setup of your blog will start. Once finished a box will appear with “Congratulations, Your new website is online”
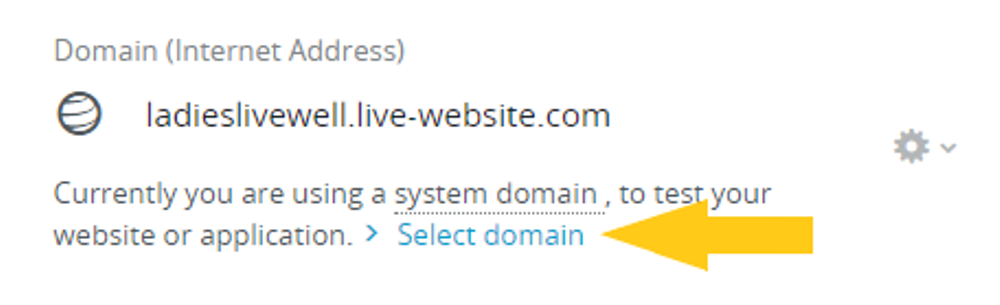
You will now need to assign the domain because you are currently using a system domain.
On the same screen, click the highlighted text where it says Select Domain:
You will then be taken through to another screen where you can click on your domain name.
Once you have clicked on your domain name a new screen will appear where will see that your domain is connected but not secure by showing a red padlock icon:
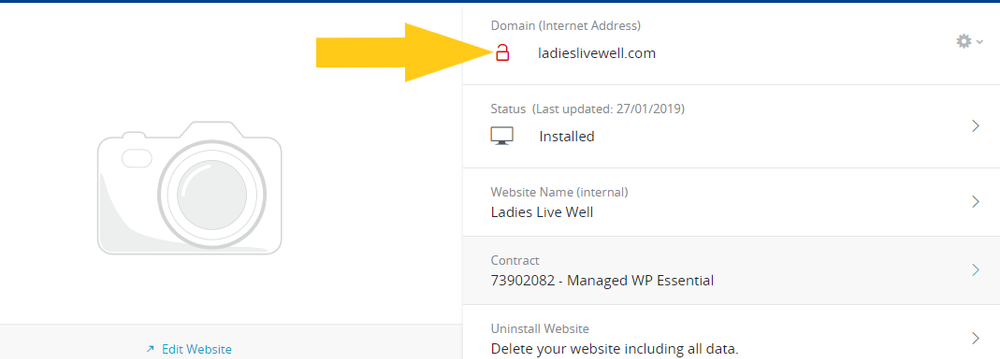
Just hover over the red padlock and a pop up will appear saying “click icon to secure domain.”
Click the red padlock icon and you will get taken to the Ionos SSL certificates for your website:
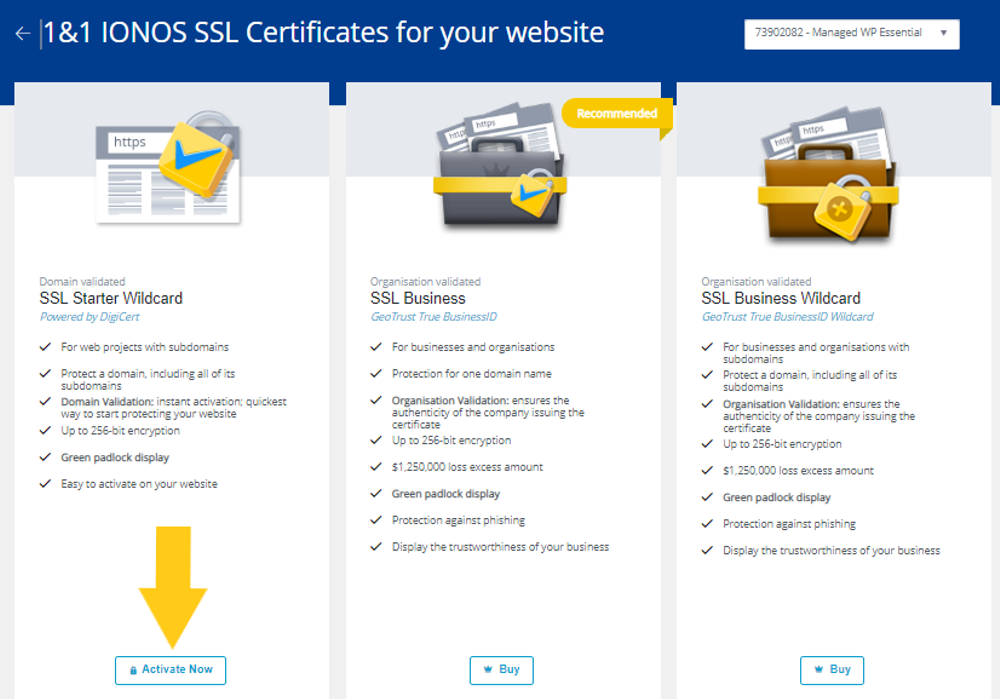
Click the Activate Now button for the SSL starter wildcard.
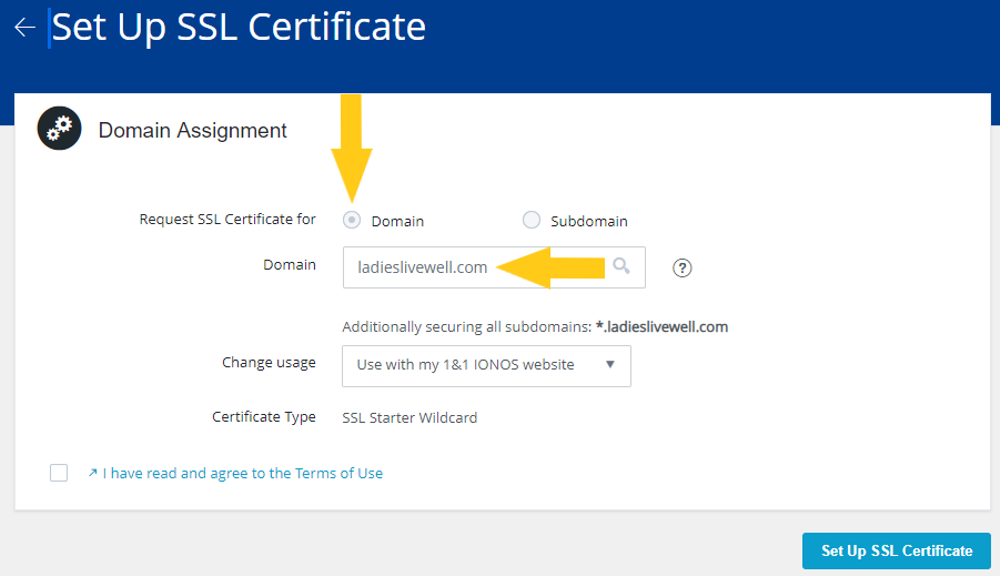
Make sure that domain is checked and your domain name is in the domain box. Tick the terms and conditions then click Set Up SSL Certificate:
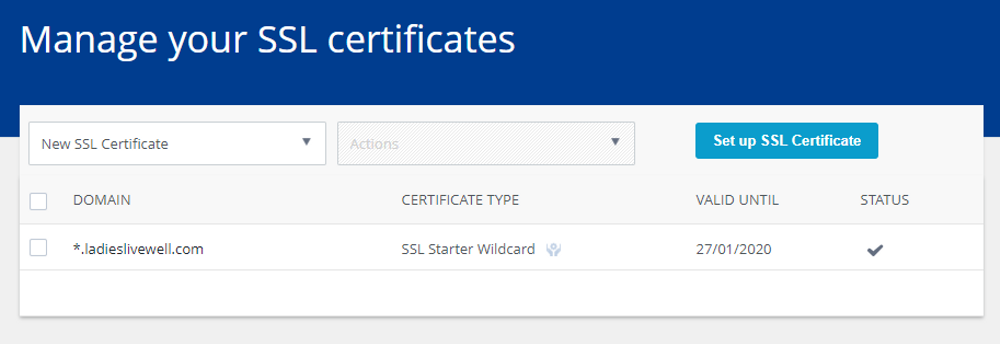
Once it has successfully completed click Ok:

Your SSL status should now have a tick to show it is active:
When your SSL is activated and working correctly the secure padlock will show in your browser.

Logging in to Your Blog
There are two ways to log in, the first is through your Ionos control panel. See the site as an example below:
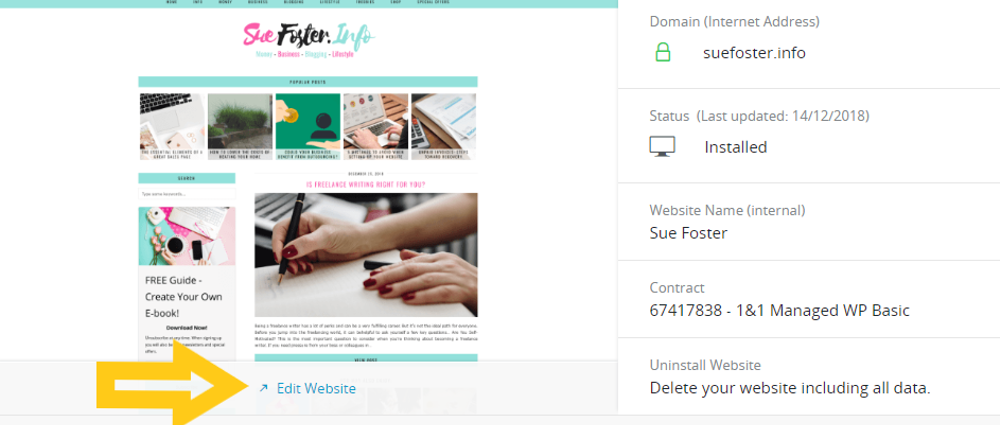
When you log into 1&1 Ionos control panel you’ll see your site under Websites and Shops.
Click Manage Website then click Edit Website to go directly to your WordPress login page. Log in with your login details.
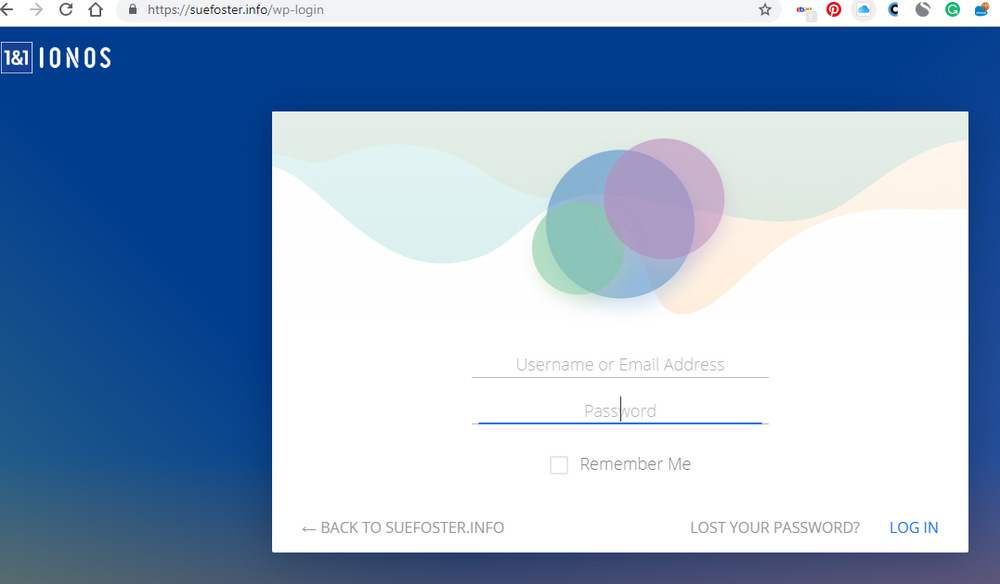
The second way is to type your domain name with /wp-admin or /wp-login added to the end of it:
http://www.yourdomain.co.uk/wp-login or wp-admin
The login box will appear for you to enter your login data:
If you have any problems at all with any of this set up please contact Ionos support and they will be able to help you.
You are now ready to install your theme and start blogging!
Follow these instructions on how to choose and install a theme.
Read this post for useful WordPress tips, tricks and hacks!
Pin for later!
This is a brilliant step by step guide for anyone waiting to set-up a blog. Thank you
Lucy Zelazowski – @londonbirdlucy
Thank you!
Thank you for the article. I’ve never really thought about having a blog, as I don’t think I ever have anything interesting to say! But if I did, thanks for the tips. They are very useful.
You should try, blogging is great!
You make it seem simple