Now you can make pins within Tailwind using Tailwind Create so there’s no need to make them on another platform. This is super convenient for Tailwind users, however, it does incur extra costs depending on your needs.
I currently use Canva to create the featured images and pins for my blogs, I love it and use it every day, so I’m not sure if I’d switch to using Tailwind Create totally. I may use a bit of both.
I use Tailwind for scheduling pins, so using Tailwind Create could save me time, I’d still need to use Canva for featured images though.
Canva lets me create hundreds of pins and images, whereas Tailwind Create is limited.
Let’s look at the features and costs and see if it’s worth using and paying extra for.

How Does Tailwind Create Work?
You can start using it straight away if you already use Tailwind and make a maximum of 15 pins at no extra cost.
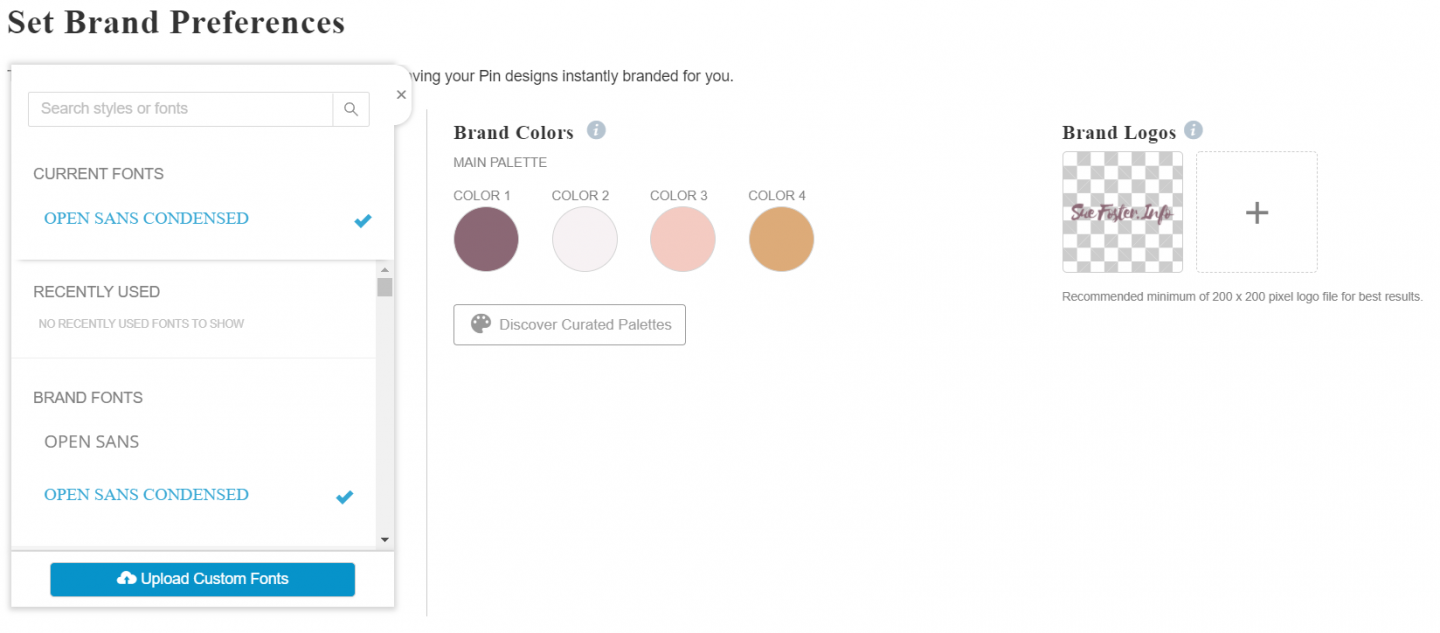
On first use, it will prompt you to select your brand fonts, and colours (limited to 4) and add your logo. This information will be saved so pins can be made quickly.
If you don’t have a colour palette, there are lots to choose from inside Tailwind Create.
If your font isn’t listed, this can be uploaded, but, it’s a premium feature so you’d have to upgrade to upload any fonts.
Creating Pins In Tailwind Create
Tailwind requires you to enter the title and URL for the post you are creating a pin for, so your post needs to be published beforehand.
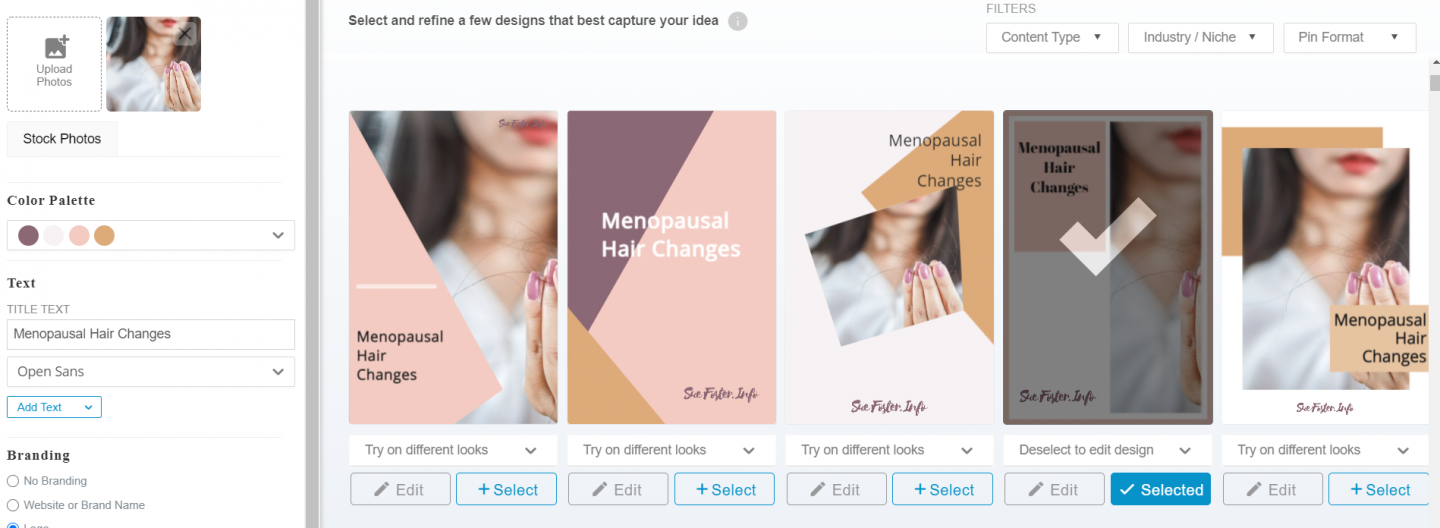
It then pulls the information and images, coming up with all kinds of pin options as you can see in the image below. That is pretty cool!
In addition to this, you can choose photos from your computer to upload or select stock photos.
You can then tweak them until you’re satisfied, then send your pin straight to the scheduler.
Tailwind Create allows you to favourite a certain amount of designs depending on your plan so that they are ready for you next time you create pins.
This saves lots of time, as they’re there ready to quickly edit and add to the scheduler.
Tailwind Create Cost
There’s a free option of Tailwind Create which I mentioned above, allowing you to create up to 15 pins, which may not be enough for most bloggers, it’s definitely not enough for me. If you’re like me and need more, you will need one of the premium Tailwind Create plans.
Note: You do need to have a monthly or Annual Plus Plan to be able to use the Tailwind Create feature.
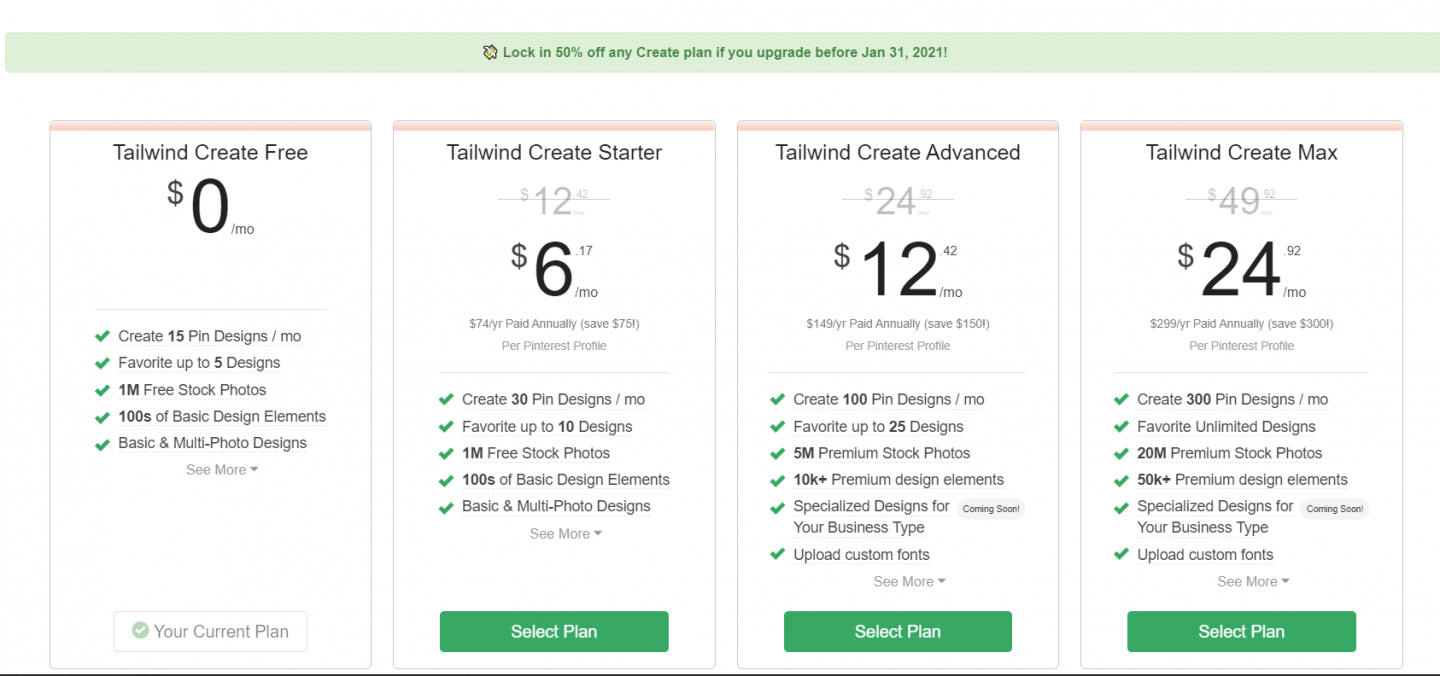
There are 3 Tailwind Create plans:
Free: Up to 15 pins
Create Starter: Up to 30 pins
Create Advanced: Up to 100 pins
Create Max: Up to 300 pins
See the image below for all the features included of each plan.
At the time of writing this post, you can see that the plans are discounted.
To check out the current prices of Tailwind Create, you’ll need to log into your Tailwind account or become a user of the Monthly or Annual Plus Plan.
New to Tailwind? Try Tailwind for free here and see if it’s for you.
Conclusion
This is a great tool for anyone who creates pins and would like to log in and use just one platform to create and schedule them. I love this feature and I’m sure it will be most welcomed to existing Tailwind users.
The only niggle I have is that I would prefer to be able to create a pin and add it to my post before publishing it.
Tailwind Create wouldn’t let me make a pin without entering the URL. I had to publish the post first then download the pin and add it to the post afterwards.
This is an excellent tool, however, for creating and scheduling fresh pins for existing posts. Pinterest Virtual Assistants may find Tailwind Create useful for creating extra pins for their client’s content.