If you’re using a plugin in WordPress and see a message asking you to increase your WordPress memory, you’re not alone. Don’t worry, it’s easier than it sounds. Here’s a simple step-by-step guide.
Step 1: Check Your Memory Requirement
Some plugins need at least 128M of WordPress memory to work properly. That’s the example we’ll use here, but you can adjust the value higher if needed.
Step 2: Get Your FTP Details
You’ll need access to your website files via FTP. Most hosting accounts provide these login details, usually labelled Host, Username, Password, and Port number. Make sure you have them handy.
Step 3: Install FileZilla
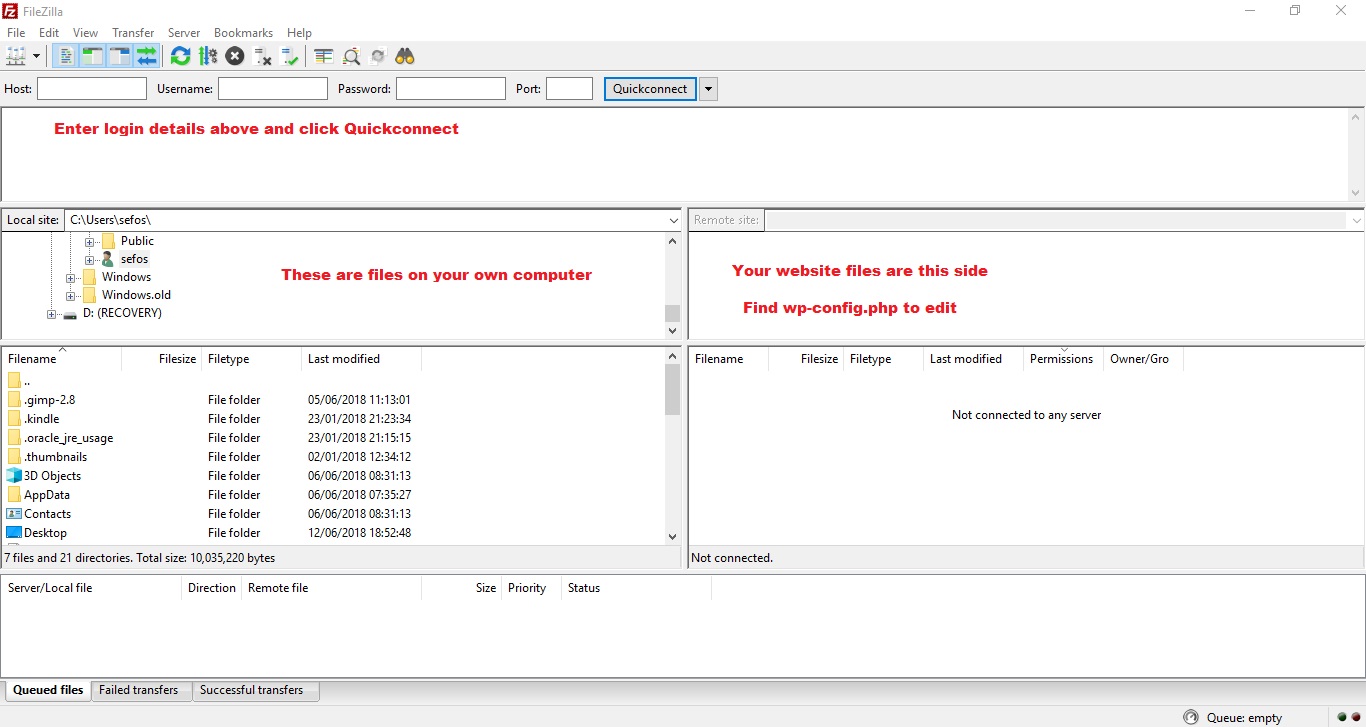
I used FileZilla, a free FTP client, to make these changes. You can download it here.
Once installed, open FileZilla and enter your FTP login details, then click Quickconnect.
Step 4: Locate the wp-config.php File
In FileZilla, look for your WordPress root folder on the remote site. Search for the file called wp-config.php and open it by clicking View/Edit.
Step 5: Edit the File
Scroll to the bottom of the file and find this line:
/* That’s all, stop editing! Happy blogging. */
Just above that line, add this:
define(‘WP_MEMORY_LIMIT’, ‘128M’);
Save your changes and upload the file back to your site if prompted.
Step 6: Check Your WordPress Dashboard
Return to your WordPress dashboard. Any memory-related warning messages should now be gone.
If it hasn’t worked, don’t worry, your hosting provider can usually increase your WordPress memory for you.
Increasing memory beyond 128M is possible if your plugins require it. Tutorials for using FileZilla can be found on their download page.
I hope this guide makes it easier to keep your WordPress site running smoothly!