When you start KDP publishing and upload a book, you will be asked to choose bleed or no bleed. Often this can be confusing to new publishers. In this post, I will explain what the difference is and the tools you can use to make sure your books are made to Amazon’s specifications.
What is No Bleed?
No bleed is when the text, lines or images don’t go all the way to the edge of the paper and there is a white border all the way around the edge of the page. Everything is contained and set away from the edges.
What is Bleed?
Bleed is when your text, lines and images go right to the very edge of the page. Even if only one page of your book requires bleed then you must select this option.
KDP Templates
You will need to have the correct dimensions for your cover and interior and know how many pages your book is going to have before starting. You need to know how many pages because the spine width will be different depending on how many pages your book contains.
This can be done by using Tangent Templates. They have a handy tool called KDP Helper which will generate templates and dimensions for covers and interiors.
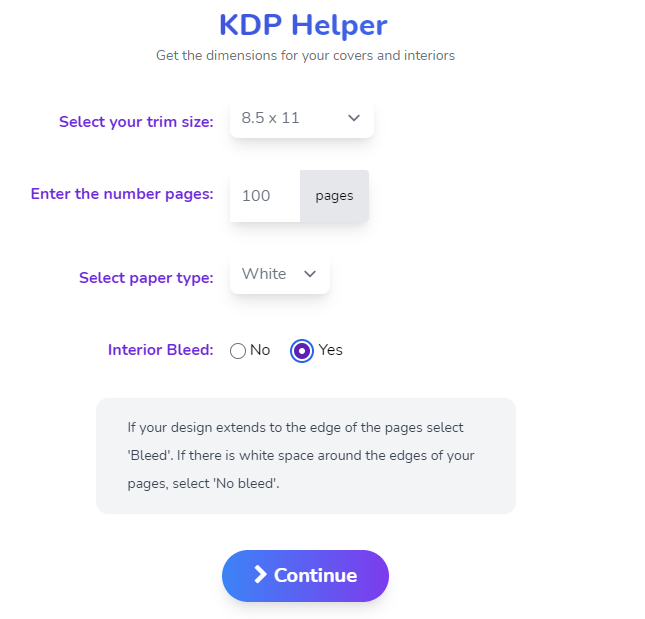
As you can see pictured above, it’s easy to use. Simply select your trim size, enter the number of pages in your book, select the paper type, white, cream or colour then choose the interior bleed; yes for bleed and no for no bleed.
It will then generate the correct dimensions for you to use along with templates to upload to Canva or other software such as Keynote, PowerPoint and Adobe Creative Suite for covers and pages. It also gives the correct dimensions when using KDP Cover Creator.
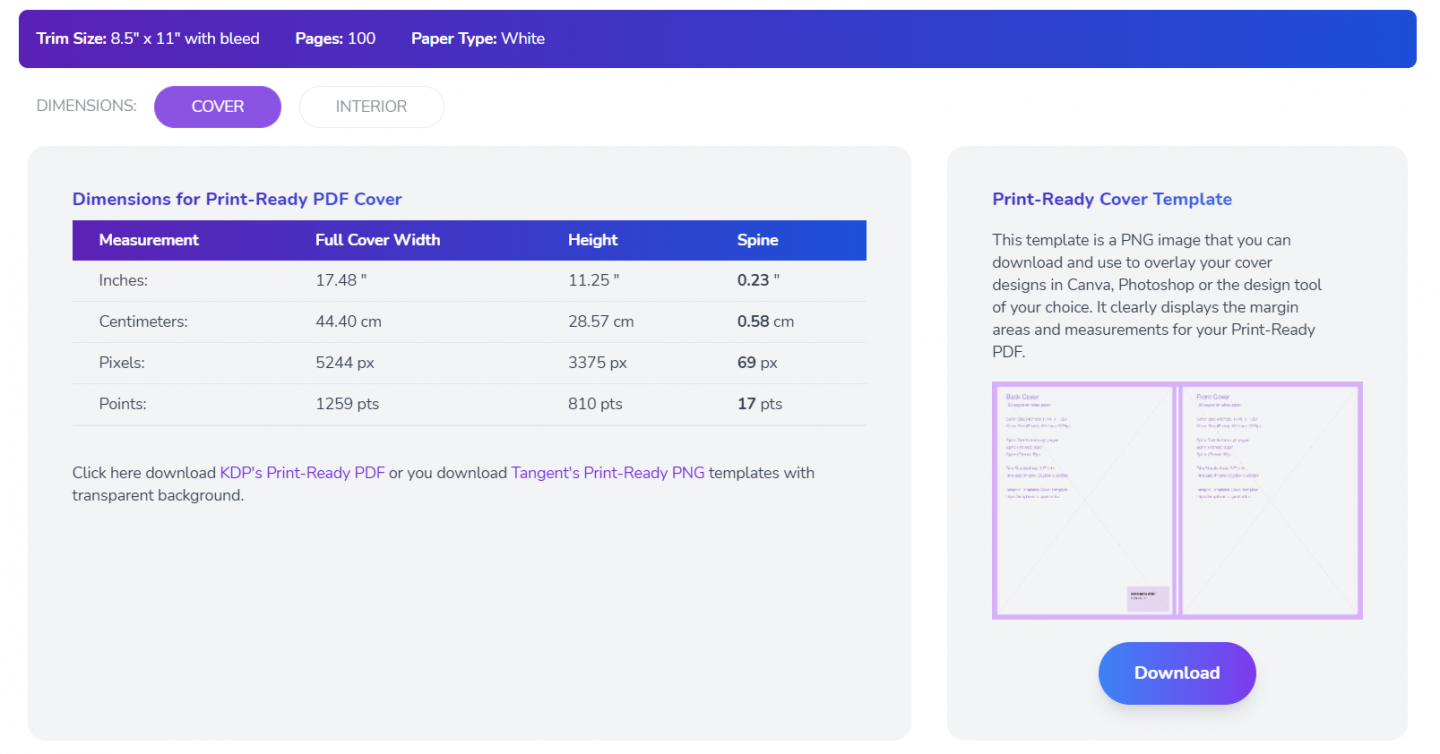
I use Canva to create many of my covers and I also use it to edit interiors. The image above shows a downloadable cover template to use to overlay cover designs.
This clearly displays the margin areas and really helps with designing so that you can make sure everything is centred and any text on the spine doesn’t go over the margin area. If you scroll further down the page it will show you the dimensions to use in Canva and other software.
You can toggle between Cover and Interior. Switching to the interior gives you a template and dimensions for the interior pages of your book.
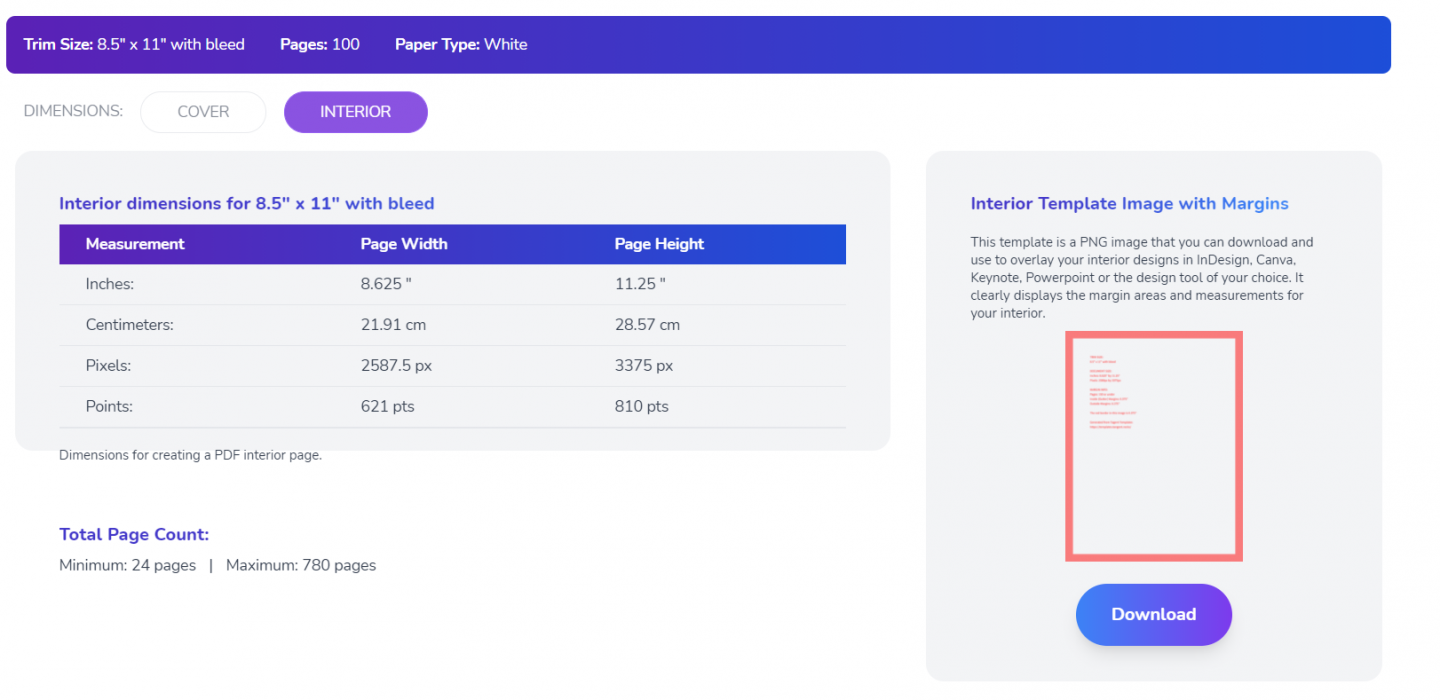
The image above shows the downloadable overlay for your interior page designs.
Buy Pre-made Interiors
If you prefer, pre-made interiors, ready to upload, can be bought from Creative Fabrica. Some of their interiors are editable on Canva, which is what I like to do I do to make them original.
It’s worth taking a look at the range of interiors they sell, as using them can save a lot of time. I have a subscription where I can download and use anything from the site. Having a subscription works out way cheaper than buying interiors individually. I also download all of my graphics here to use in my book designs.
Book Bolt also has plenty of interiors to choose from and a handy user-friendly cover designer.
You may also wish to read these KDP-related posts: How to Make Money with Low Content Books and Getting Started with Amazon Ads For KDP.